Thursday, December 27, 2012

It arrived! It arrived! You need to get this book!

Hi there!  Yesterday, 12/26/12, my brand new Gertie's New Book for Better Sewing arrived!  Yay!  I'm so happy!  This truly is one of the best and most informative books on sewing I've read in many many years!  So dear readers I urge you, buy Gertie's New Book for Better Sewing!  Not only are Gretchen's patterns really fabulous, but the instructions she gives you on how to complete each look and each pattern are very well written, clear and to the point!  She shows you how to do so many different sewing skills that have either fallen by the wayside or else the skills are just not being taught any more and they should be!

Get this book:  Click on the box below where you see "Gertie's New Book for Better Sewing".  You'll be glad you did!  Thank you.


Sunday, December 23, 2012

Pamela's Embroidery

Hi dear readers!  Today on Christmas Eve I have a new link to share with you!  

Pamela's Embroider 

This kind lady lives in Australia and she makes some of the most beautiful machine embroidery designs I've seen in some time - not that there are not many many beautiful embroidery artists out there!

I hope that everyone has Happy Holidays!

Monday, December 17, 2012

Patterns from the Past and Gertie's New Book

Hi there!  Today I'd like to talk about a great site, Patterns from the Past:  Click here  I was reminded of this website by Mrs. Depew's blog:  Click here.  What's great about Patterns from the Past is that Michelle is having a big sale and also a $50 giveaway!  Why don't you pop on over to Patterns from the Past and pick out your favorite pattern and post it on Mrs. Depew's blog?  You might win! 

Next I want to talk about Gertie's New Book for Sewing by Gretchen Hirsch.  Just click on the amazon button - please! 

I have a fair number of sewing books scattered around the house from various, different authors, but no book has excited me more in recent times than this one!  I have ordered it and I am anxiously awaiting it's arrival.

Although Gertie's main focus is on patterns and sewing methods used in the 1950's, it is a great reference for those interested in sewing better, couture sewing, or making fabulous clothing from the past!  You won't be sorry with this book!  It is hard, spiral-bound so you can open it up near your sewing machine or sewing area and follow along.  She references the techniques she is using to create specific, (absolutely gorgeous), fashions by page number so say if you wanted to create a bound button hole, she would tell you to go to the page where this technique is explained.  Her explanations are terrific and fully illustrated!  Even a beginner like me is left anxious to try them!  She also includes a number of patterns right in the book in the folder so you can pull out the specific pattern you want to make, place it on your table, trace it and voila - a custom made pattern just for you!  She shows how to alter patterns to fit and so many other skills and techniques too numerous to mention here.  If you have no other sewing book, I highly, HIGHLY recommend you get, "Gertie's New Book for Better Sewing."  Click on the amazon button above please.  Also have a look at Gretchen's blog here.

Be sure and leave me your comments, questions, suggestions or anything you like!  Also please follow me as I will endeavor to post more!

Friday, December 14, 2012

Convert Your Mechanical Sewing Machine to Hand Crank

Hi there!  Eureka it actually works!  I thought about the idea of converting my New Home model SS-2015 mechanical electric sewing machine to hand crank for a long time.  Why? 

  1. With the coming skyrocketing rates in electricity there may come a time when we can't afford the electrical bills.
  2. This model of sewing machine has many decorative stitches that the older models of sewing machines just don't have.  It would be nice to keep those decorative stitches, even without electricity.
  3. This sewing machine is portable.
The first part was I had to figure out how to take the handwheel off.  It turned out that there was a little circle in the center that was just a plastic cover.  I pried that off, gently, with a fake allen wrench.  After that I removed the side panel screw and the side panel.  Luckily for me there was no allen screw in the vents of the side panel.  It just popped off after a bit of gentle prying.  Then I took off a clip which was there to hold the handle of the sewing machine on the top and side part.  Then the motor belt came slipping off.  After that I removed the handwheel by means of a screw in the center of it. 

Then I thought about what I actually would need to convert it to a hand crank.  What I really needed was a handwheel with a handle on it.  I looked on eBay and found this one:


This is a 12mm x 125mm Milling Machine 3 Spoke Hand Wheel with Revolving attached handle.  The wheel is a bit heavy, but not overly so and is made of a hard plastic with steel parts.  The handle screws into a recessed hole located in the outer rim as you see.  

I put the sewing machine back together including the side panel.  Afterwards my husband took the new handwheel and went to Ace Hardware where he found a bolt and some washers.  It was then a simple matter of putting on the washers and bolting the handwheel to the outside of the old handwheel, making sure that the two handwheels meshed tightly together so that they would turn as one.

Cons:  
  1. I can't put on the hard case on the outside of the machine.
  2. I would be unable to use the stop lock, formerly in the center, to disengage the needle for winding bobbins.
The results are very good in my opinion:


Now this machine can sew either with or without electricity.  I have sewn a bit on scrap cloth both ways.

Cost of this project:  $13.00 for the "new" handwheel, $5.00 for the bolt and washers.  Time and labor on our part.

Hope this helps someone who is considering converting to treadle or handcrank, but who does not want to go out and buy a whole other sewing machine!

 Thank you for reading!  Please be sure to follow me, subscribe and leave your comments.  Let me know what you think?  


Wednesday, November 28, 2012

Goss's Acne Cure Program

I thought I would revisit this topic because it is such a problem for many many people whether young or old.  Yes Adult Acne IS a problem too!

I can't tell you how great Goss the Makeup artist is.  His program for Acne is the only thing that worked to clear up my skin.  Because of my many medical problems and issues some of the "bumps" I have are not truly acne, but for those that ARE acne Goss's program worked for me.

Watch his video FIRST - Click here

From Goss's video description he writes as follows:

"THIS PROGRAM WILL WORK FOR MILD TO MODERATE ACNE AND CYSTIC ACNE.

Steps:

1. Use a mild water based cleanser. Cetaphil is the best.

2. Use 2.5% benzoyl Peroxide (BP) and use a lot. The size of your pointer finger. Apply this to all areas that are effected with acne. Do this twice per day. BP cream is available over and under the counter in most chemists and drug stores. Please use 2.5% unless this proves ineffective. Only then should you increase to 5-10%. 90% of all people using 2.5% will find the program works and works fast. Increasing the strength does not mean it will work quicker so please use 2.5% to being with.

3. Moisturise. Your skin will before dry. VERY DRY. It might flake, peel, and become red. An SPF is your best bet as these are naturally very moisturising and will deal with the dryness.

Depending on your skin condition it might take depends on how quickly the program works. I noticed a massive change within 48 hours. How long it takes your skin to heal will depend on the severity of your condition. It will improve. And fast but you will need to make sure you're following the steps outlined above.

It is normal for the skin to become red. This was not a worry to me as anything was better than the acne i was suffering. Once your acne is under control you will be able to lessen the amount of benzoyl peroxide (BP) you're using and this will stop/reduce the redness and peeling (dry skin) that accompanies large amounts of BP cream.

NOTE: This program also works for acne on the back, neck and chest. You need to bare in mind that BP cream can bleach clothes so if you're using it on your back or chest caution is advised.

I am not the only one to come up with this idea. Here is an excellent website that follows the same procedure as the one above. I wish i had found this website when i was dealing with my acne as it would have saved me a lot of pain, heartache and money searching for products that worked. The site also sells products. I am not affiliated with this website, but I can vouch for its effectiveness with the products recommended. (the benzoyl peroxide cream)."

http://www.acne.org/

http://www.danielkern.com/product-p/treatment-8.htm

Please let me know how things turn out for you.  I know how devastating this problem can be.  Thank you for any comments and please follow me.

Thursday, November 22, 2012

The Mythical Pink Atlas Sewing machine

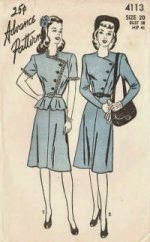
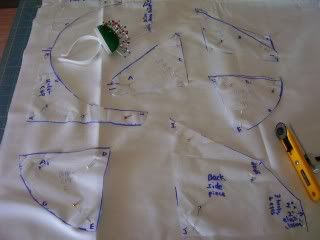
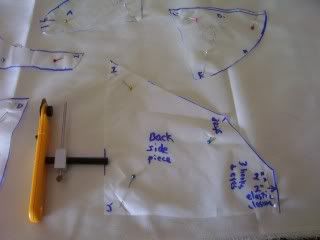
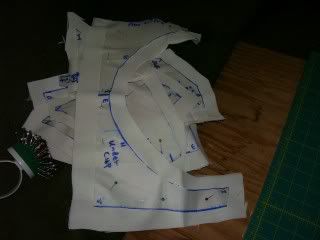
Hi!  So sorry I have not posted in a long time.  I have made some new pattern pieces for the bullet bra, but alas, my health is not that great, for those of you who know me, so I haven't gotten very far on that project YET.
*********************************************************************************
Today's Thanksgiving Day post will be on the topic of the mythical Pink Atlas Sewing machine.  The Pink Atlas sewing machine is a 1950's industrial strength type of home sewing machine.  The best part about this sewing machine is it is PINK.  Yay!  Hope you can see that in the font colors.  The machine has one of the early external thread tension buttons, spools or knobs(?).  You can hopefully see it there in the picture about 1/2" above the needle - a little silver tone round knob.  I do not own this machine.  The Pink Atlas sewing machine is super sturdy made of steel and other heavy duty components.  It is a straight stitch machine.  The Pink Atlas sewing machine weighs about 40 pounds or so.  The motor is external and is belt driven.  

It's not so easy to find these excellent sewing machines in working condition; however, there is a really cool Youtube video where a nice lady shows how you can fairly easily convert your Pink Atlas sewing machine to a hand crank model.  When you do that it sews so very quietly!  

Why would you want to convert to a hand crank sewing machine?  The EPA and the current administration in the United States is closing more and more coal-fired power plants as fast as they can.  If you live in places where your electricity is made using coal-fired plants, get ready to have your electric bills either A. skyrocket!  or B. the electric plant closed or C. Both! 


Here are NiftyThrifty Girl's two videos on an older type of Pink Atlas Sewing machine.   Video 1  and you also need Video 2 because she learned more about the machine as she went along.

This next photo below is of the "Rocketeer" sewing machine like Jane Jetson might have used!  (The picture below is also linked to wikipedia about the Jetsons cartoon).


It is the Singer Slant-O-Matic Model 500A.  These glorious cam and gear driven sewing machines were manufactured in the early 1960's.  Isn't it wonderful?!  Check out BrianSews blog here.  And the Slant O Matic Fanatic here.


Here is a picture of the Rocketeer in green.  Isn't it divine?  From what I understand, the Singer Slant-O-Matic 500A Rocketeer will sew about 30 different stitches using combinations of settings and metal cams, besides the basic straight stitch and zig-zag.

Niftythriftygirl sells her machines on eBay and below is a link to her YouTube video explaining all about the Singer Slant-O-Matic Rocketeer sewing machine that she had for sale in the past.  Click here for NiftyThriftyGirl's GREAT explanation about the Singer Slant-O-Matic Rocketeer model 500A.


What you really should think about investing in, if you are a free spirited sewist, is a spoked wheel attachment and a hand crank.  These after market parts are made in China.  They are not as smooth and nicely machined as original Singer models used, but they do work for most any sewing machine that has an external motor.


I am thinking of trying it on my New Home SS-2015 sewing machine: update:  That would not have worked because my machine's motor is on the inside and it would have made the handcrank assembly too heavy.


Even though the motor is internal in the New Home SS-2015 - I'll just see about that!  My first experiment was to turn the hand crank wheel on the right side when the power was completely off.  I should have put a piece of fabric in there first -duh!  Anyhow, the wheel turned smoothly and didn't seem to catch on anything at all!  I was later able to remove the matted threads nest I had created below the needle plate or in the bobbin area.

If you don't want to go to the trouble of converting an existing mechanical sewing machine, (this won't work for the computerized models obviously, because there is no way to select your stitch without electricity nor can you change the stitch length or needle position, among other settings), is to just buy one of the beautiful antique treadle or hand crank sewing machines such as this Singer 66 model or "Red Eye" shown below without its table.  I believe this machine is a treadle sewing machine.  If you do buy one of the antique sewing machines BE SURE you have a wooden base for the hand crank model or, in the case of a treadle sewing machine, a treadle sewing machine table for it.  It won't sew otherwise as there are gears and things on the underneath side that need to have empty space to work freely.


You can find the Pink Atlas Sewing machine on Etsy.com, eBay and other places.  You can find the hand crank and spoked wheel after market attachments on eBay and other places on the internet.  You can find the antique Singer and other brand sewing machines in either treadle or hand crank models on Etsy.com, eBay, flea markets, swap meets, garage sales, Estate sales, Craig's List, Antique shops and many other places.

Be sure to pick up a manual for your machine.  If you don't have a manual or, like me, you lost yours, you can get one here from the following sellers:

http://www.sew4less.com/manuals.php

http://www.sewusa.com/Sewing_Machine_Instruction_Manuals.htm

Also on the sewusa.com website you can click on your sewing machine's manufacturer and, for some of them, they also include the service manual.  This booklet can be invaluable.  The pricing on the sewusa.com website is slightly lower, but not by much.

Or you may find sewing machine manuals in other places or eBay and Etsy.com.

Thank you for reading!

My shop on eBay.com

My shop on Etsy.com


Sunday, November 4, 2012

Wednesday, July 25, 2012

07/25/12 Bullet Bra progress - Pattern Pieces Markup

Hi there!  Today I have finally cleared off the dining room table and completed marking the pattern pieces for the bullet bra!  Yay!  I have used Muslin that I got on sale or at a good bargain from http://www.fashionfabricsclub.com/.  Today I didn't notice any Muslin at all, yet this is where I bought it from.  You're sure to find another fabric you can use, as I did, for your mockups - just keep looking.  :) 

I used an ordinary pencil with an attached eraser as one of my markup tools.  I've found that a pencil works well for this as if you make a mistake you can easily, literally, erase it!  To draft my patterns I use the Lutterloh plastic tools and also the Bruce Oleyar tools or curves.  These rulers work well.  I got the Bruce Oleyar tools on sale from a person on eBay.  The pattern drafting board is made of cardboard and, luckily for me, my husband worked to reinforce the board on the back with Elmer's glue boards made of Styrofoam.  These you can buy at Walmart along with the pattern drafting board.  The pattern drafting board was about $5.00 or so.  Also I used an ordinary wooden ruler, but you can use the fancy Bruce Oleyar curves and/or the Lutterloh curves or any cheap, plastic, see through ruler - even rulers for quilting if you have those available.  I had a tape measure handy to measure my completed patterns on another project.  I used ordinary, store brand tape to tape some of my pattern pieces together for another project.  I used a medium sharpie to draw or draft the pattern pieces.

Here are the pictures:

Here you can view the sharpie, the pencil, a pen, ordinary scissors, ordinary scotch tape, tape measure and a wrist pin cushion.


Bruce Oleyar curve on the left side and the Lutterloh curve on the right side.


Furthest away from the viewer are the Lutterloh hip curve and the Bruce Oleyar two piece hip curves.  On the left is the back side band, in the center is the left side of the underbust band along with the four part bust piece - (just the left bust).


The left bust area and the Lutterloh curve.

I drew in all the seam allowances as well as the other markings, due to the fact that I am not yet very skilled at cutting out the fabric with the 28 mm Olfar Rotary Cutter and Seam Allowance Guide.                                        


The actual lower band.  This piece will have a center piece of 2" of 1" wide elastic.                             


I hope to do more later.  If you need larger pictures email me.  Please stay tuned and follow me!  Thank you!


Wednesday, July 4, 2012

Mrs. Depew

Hi!  I just have to post a mention in my blog about Anna Depew's blog and her items for sale on Mrs. Depew Etsy.com.  She is a very knowledgeable woman who specializes in recreating vintage patterns.  Her own items for sale on Etsy.com come with clear instructions and her photos and explanations, especially on her sew a long's are really helpful.  The lingerie is really beautiful.  If nothing else her website on Etsy.com is worth a look for anyone interested in vintage lingerie, sewing patterns, knitting patterns and similar things.  She answers any questions you may have and is always happy to help.  Right now she is having another giveaway of her patterns!  What could be better than that?  You really should follow her blog, "A Few Threads Loose".  Thanks for reading and stay tuned for my bullet bra updates!

Friday, June 15, 2012

Bullet Bra: Layout and cutting out pieces

Hi!  There's been a lot going on here and today, June 15, 2012, I have finally had the opportunity to lay out the bullet bra pattern pieces on the muslin and cut them out.  The photo below shows some of the pattern pieces laid out onto the muslin and also the Olfa rotary cutter with guide arm and the Olfa green cutting mat.  One will not work without the other, trust me.  The Muslin bolt I purchased is 48" wide and was rolled onto the bolt doubled.  For every piece I cut out there will be four pieces.  Next time I'll undo it so there won't be so many on the folded fabric.  The fabric is 24" wide when folded and it would take about 24" of fabric if your fabric is 48" wide for the size 46 DD bullet bra.  Please note that this bullet bra will be made out of cotton or similar fabrics - NOT the stretch fabrics, slinky, milliskin, tricot or spandex lycra of most bras.

Layout of pattern pieces


The pieces cut out but still pinned to the pattern pieces


Finally, shown above, here are the pieces cut out.  I still have to mark the pieces so I kept the patterns pinned to them.  This is my first use of the Olfa rotary cutter and guide and single large Olfa cutting mat.  I must say it will take more practice on my part in order for me to get proficient in its use!  Buy yours here.  Buy the Olfa rotary cutter and guide arm by itself here.  It was not as easy as the video made it look. This video, by Bruce Oleyar, is really a great addition to any seamstress or would-be seamstress's or tailor's video library.  Bruce not only explains step-by-step how to use the Lutterloh system, but also how to alter pattern pieces, sew them together correctly so you don't get that "hand made" (unprofessional) look, how to design your own patterns and more.  Please note that my own bullet bra pattern was made by me using my own measurements and some ideas I found freely on the internet. 

You may also find the Olfa products for sale on such websites as eBay.com or else other websites.  If you have a Michael's store nearby, they used to sell them there; however, I am not sure if they still carry them.  Certain select sewing and/or fabric stores may have these Olfa products as well.  Don't buy the Fiscars or other cutting mats as they will dull your blade and not cut correctly no matter the brand of your rotary cutter.

Because of my various health problems this simple step of laying out the pattern pieces, pinning them to the muslin and then cutting them out left me needing rest.  Normal people should be able to cut out the pattern pieces in perhaps about 20 minutes or so.  My husband also helped me by laying the plywood, cutting mat and fabric bolt out for me on the bed.  I don't have a cutting table - wish I did.  I have to do things that are affordable to me and this economy is bad, as you know.

So as I mentioned the next step would be for me to mark the individual pattern pieces and to "clean them up" with a pair of sharp scissors I use ONLY for cutting fabrics.  I suggest you also buy a good pair of shears and use them only to cut fabric out with.  Don't even use them to cut out the pattern pieces as that will dull the blades of most shears or scissors really fast!  You might like to try the Kai scissors here.  My own scissors I purchased a long time ago from a sewing and fabric store - I forget which one.  They were fairly expensive, I think about $30.00 at the time.  They are Gingher scissors.  If you need larger pictures please contact me and I can send them to you.  :)

If you have any comments, criticisms or suggestions, please leave them.  Thank you!  :)

Tuesday, May 22, 2012

Bullet Bra

Hi!  Today I have re-drafted for about the third time, my version of the 1950's bullet bra pattern.  This is turning out to be quite a project for me.  I found a way to measure the cups for my size and hopefully, later on, I can make some for other people in other sizes.  I have the four part or four piece cup, the piece that goes around the cups for the center of the bra as well as the bottom and side, the side piece which has turned out to be a bit tricky and also the bottom band which is proving a bit tricky itself.  I will use cotton muslin for my mockups and I'm thinking about using black thread so that as I am sewing this and later on posting pictures, the stitching will stand out.  In the past, I bought a circle foot attachment for my sewing machine.  I'm hoping this device will make it fairly easy for me to sew the circle stitching on the bra.  I can't wait until I will be able to cut out this pattern and start stitching it to see if it will really work!  I have not made the straps yet and I might use some bra straps I bought some years ago.  In addition, I have designed this pattern to work with the bra extenders so that a person can easily stitch the hooks to one side and the loops or holes to the other side of the completed bra.

Here are some examples of bullet bras on the website:  "What Katy Did".  If you are anything like me, the prices are really high for a simple bullet bra and also the sizing is quite small for those of us who are plus-sized gals.

Before the Bullet Bra dot net website went out of business permanently, I had purchased a couple of bras from them, one in black and one in white.  What I like about the bullet bra is it really makes your breasts have that late 1940's or 1950's through 1960's extreme pointy look.  Drawbacks for me are the small sizes.  I've already way outgrown my original bullet bras I purchased and I've always disliked the ill fitting side and back bands or pieces.  For my particular shape, because I have had two open-heart surgeries, I need to have a bra that has about two inches of space between each breast at the top.  Also I need a wider treatment on the side panels, just like they used to have in the 1940's and 1950's on their bras to hold in additional flesh, for lack of a better term.  Also the straps of all bras are continually falling off my sloped, smallish shoulders.  For my own bra that I'm planning on making, I will move the strap back until it is two inches inside of the bra closure at the back.  This should bring the straps closer in the back so that, hopefully, the straps won't continually fall off me.  Thank you for reading and stay tuned!