Showing posts with label bra making. Show all posts

Tuesday, December 3, 2013

New Bra Pattern Pieces and the Sewing Machine Broke

Hi there!  I hope that all have had a good Thanksgiving and that you all will have a Merry Christmas, or that you have had a Happy Hanukkah or Qwanza or whatever holidays you may celebrate!  Cheers!
******************************************************************************* 

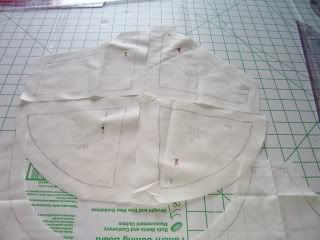
I have taken some more pictures of the bra pieces and thought I would post them here.  Now this is a different pattern than what I had before.  This pattern I made from several different patterns.


This bra is going to be made of mainly non-stretch fabrics like cotton and/or satin.  There will be a small piece of elastic for the very back where the hooks and eyes go.

I have cut out two of each part except for the center piece.  There is a top cup piece, a bottom cup piece, an inner "sling" for uplift and support, a center "spacer" piece (most people would not need the center piece - I happen to be one of the people who does need it), an under the cup band and the regular band.

My problem now is my sewing machine is broken again!  Ack!  I'm hoping it won't be too difficult to fix.  I am using the sewing machine mostly for the embroidery functions and I am guilty of "stacking thread" - that is embroidering one design on top of another.


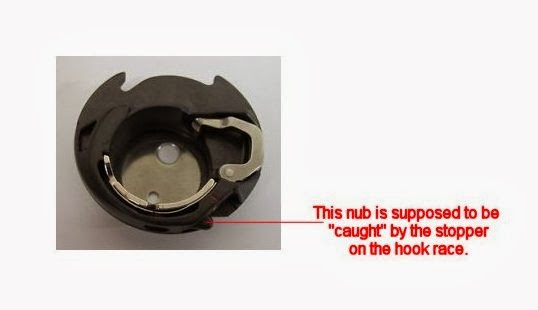
Suppose you had this design, like I have, and that the colored squares are satin stitches going in a vertical direction...  Well I wanted to put this gold border around the whole square as well as each individual square and have the "lines" be in the satin stitch too.  I think it may have been asking too much?  So I got the thread nest below the embroidery as it was sewing - which I stopped and cut off and removed the thread pieces I could see caught.  Then I tried to start again and it did it again - only this time the stopper did not stop the bobbin case and the bobbin case came out of its track in the hook race and spun around and the needle came down and sliced into the edge of the bobbin case and then punched some holes clean through the bobbin case.  Boo hoo!


I have since changed the design to be a normal fill stitch in the hopes that the gold lines would "work" better, but I just get so frustrated.  In order to complete the design I was working on for my customer, I will have to try continuing the design in the satin stitch for the lines once the sewing machine is repaired.

So there it is, my post for December 3, 2013.  Hope you like this.


Wednesday, July 25, 2012

07/25/12 Bullet Bra progress - Pattern Pieces Markup

Hi there!  Today I have finally cleared off the dining room table and completed marking the pattern pieces for the bullet bra!  Yay!  I have used Muslin that I got on sale or at a good bargain from http://www.fashionfabricsclub.com/.  Today I didn't notice any Muslin at all, yet this is where I bought it from.  You're sure to find another fabric you can use, as I did, for your mockups - just keep looking.  :) 

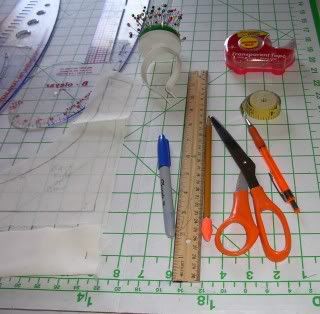
I used an ordinary pencil with an attached eraser as one of my markup tools.  I've found that a pencil works well for this as if you make a mistake you can easily, literally, erase it!  To draft my patterns I use the Lutterloh plastic tools and also the Bruce Oleyar tools or curves.  These rulers work well.  I got the Bruce Oleyar tools on sale from a person on eBay.  The pattern drafting board is made of cardboard and, luckily for me, my husband worked to reinforce the board on the back with Elmer's glue boards made of Styrofoam.  These you can buy at Walmart along with the pattern drafting board.  The pattern drafting board was about $5.00 or so.  Also I used an ordinary wooden ruler, but you can use the fancy Bruce Oleyar curves and/or the Lutterloh curves or any cheap, plastic, see through ruler - even rulers for quilting if you have those available.  I had a tape measure handy to measure my completed patterns on another project.  I used ordinary, store brand tape to tape some of my pattern pieces together for another project.  I used a medium sharpie to draw or draft the pattern pieces.

Here are the pictures:

Here you can view the sharpie, the pencil, a pen, ordinary scissors, ordinary scotch tape, tape measure and a wrist pin cushion.


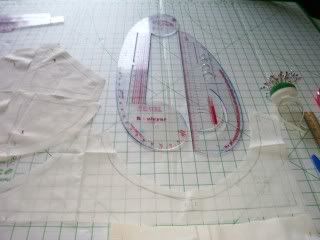
Bruce Oleyar curve on the left side and the Lutterloh curve on the right side.


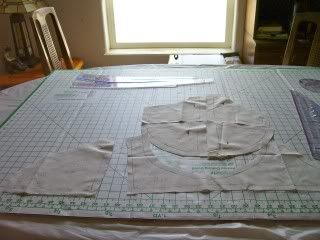
Furthest away from the viewer are the Lutterloh hip curve and the Bruce Oleyar two piece hip curves.  On the left is the back side band, in the center is the left side of the underbust band along with the four part bust piece - (just the left bust).


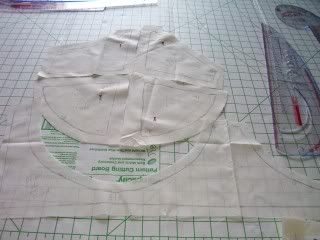
The left bust area and the Lutterloh curve.

I drew in all the seam allowances as well as the other markings, due to the fact that I am not yet very skilled at cutting out the fabric with the 28 mm Olfar Rotary Cutter and Seam Allowance Guide.                                        


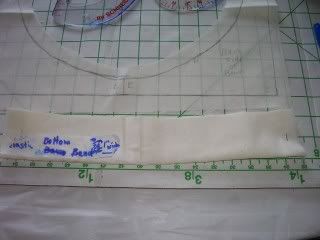
The actual lower band.  This piece will have a center piece of 2" of 1" wide elastic.                             


I hope to do more later.  If you need larger pictures email me.  Please stay tuned and follow me!  Thank you!


Tuesday, May 22, 2012

Bullet Bra

Hi!  Today I have re-drafted for about the third time, my version of the 1950's bullet bra pattern.  This is turning out to be quite a project for me.  I found a way to measure the cups for my size and hopefully, later on, I can make some for other people in other sizes.  I have the four part or four piece cup, the piece that goes around the cups for the center of the bra as well as the bottom and side, the side piece which has turned out to be a bit tricky and also the bottom band which is proving a bit tricky itself.  I will use cotton muslin for my mockups and I'm thinking about using black thread so that as I am sewing this and later on posting pictures, the stitching will stand out.  In the past, I bought a circle foot attachment for my sewing machine.  I'm hoping this device will make it fairly easy for me to sew the circle stitching on the bra.  I can't wait until I will be able to cut out this pattern and start stitching it to see if it will really work!  I have not made the straps yet and I might use some bra straps I bought some years ago.  In addition, I have designed this pattern to work with the bra extenders so that a person can easily stitch the hooks to one side and the loops or holes to the other side of the completed bra.

Here are some examples of bullet bras on the website:  "What Katy Did".  If you are anything like me, the prices are really high for a simple bullet bra and also the sizing is quite small for those of us who are plus-sized gals.

Before the Bullet Bra dot net website went out of business permanently, I had purchased a couple of bras from them, one in black and one in white.  What I like about the bullet bra is it really makes your breasts have that late 1940's or 1950's through 1960's extreme pointy look.  Drawbacks for me are the small sizes.  I've already way outgrown my original bullet bras I purchased and I've always disliked the ill fitting side and back bands or pieces.  For my particular shape, because I have had two open-heart surgeries, I need to have a bra that has about two inches of space between each breast at the top.  Also I need a wider treatment on the side panels, just like they used to have in the 1940's and 1950's on their bras to hold in additional flesh, for lack of a better term.  Also the straps of all bras are continually falling off my sloped, smallish shoulders.  For my own bra that I'm planning on making, I will move the strap back until it is two inches inside of the bra closure at the back.  This should bring the straps closer in the back so that, hopefully, the straps won't continually fall off me.  Thank you for reading and stay tuned!